- What is Clearfacts?
- Why EMClearFacts?
- Requirements
- Installation
- Configuration
- Sending Invoices
- Queue and Monitoring
- Diagnostics and Maintenance
- Common Issues
- FAQ
EMClearFacts — Send Invoices to Clearfacts from Dolibarr
EMClearFacts connects your Dolibarr ERP to the Clearfacts accounting platform via the official GraphQL API. Send your customer and supplier invoices to your accountant in one click, with full tracking and a permanent audit trail.
What is Clearfacts?
Clearfacts is a Belgian digital accounting platform used by thousands of accounting firms and companies. It centralises accounting documents (invoices, statements, receipts) submitted by clients and integrates them directly into the accountant's software.
Why EMClearFacts?
- No more email attachments — Your invoices land directly in your accountant's Clearfacts space, in the right folder
- Customer and supplier invoices — EMClearFacts handles both flows in parallel
- Manual or automatic mode — Send on demand or as soon as an invoice is validated in Dolibarr
- Bulk sending — Select multiple invoices from the list and send them in one operation
- Two formats supported — UBL XML (preferred, reused from EMPeppol if available) or PDF as fallback
- Permanent audit trail — Every upload is recorded with its Clearfacts UUID, never purged
- Smart queue — Automatic retry with exponential backoff on temporary errors
Requirements
| Element | Minimum version |
|---|---|
| Dolibarr | Recent version |
| PHP | PHP ≥ 7.4 |
| Clearfacts account | Active, with API access enabled |
You will need an active Clearfacts account with API access. Two authentication methods are available: OAuth 2.0 (recommended) or Personal Access Token.
EMPeppol compatibility: If you also use EMPeppol, EMClearFacts automatically detects the generated UBL file and reuses it for the upload — no double generation.
Installation
From the DoliStore
- Go to the DoliStore and search for EMClearFacts
- Purchase the module and download the ZIP archive
- Extract the archive into the
htdocs/custom/folder of your Dolibarr installation - The final folder should be
htdocs/custom/emclearfacts/
Activation
- Log in to Dolibarr as an administrator
- Go to Home → Configuration → Modules/Applications
- Search for "EMClearFacts" and click Activate
A new EMClearFacts menu appears in your navigation bar.
Configuration
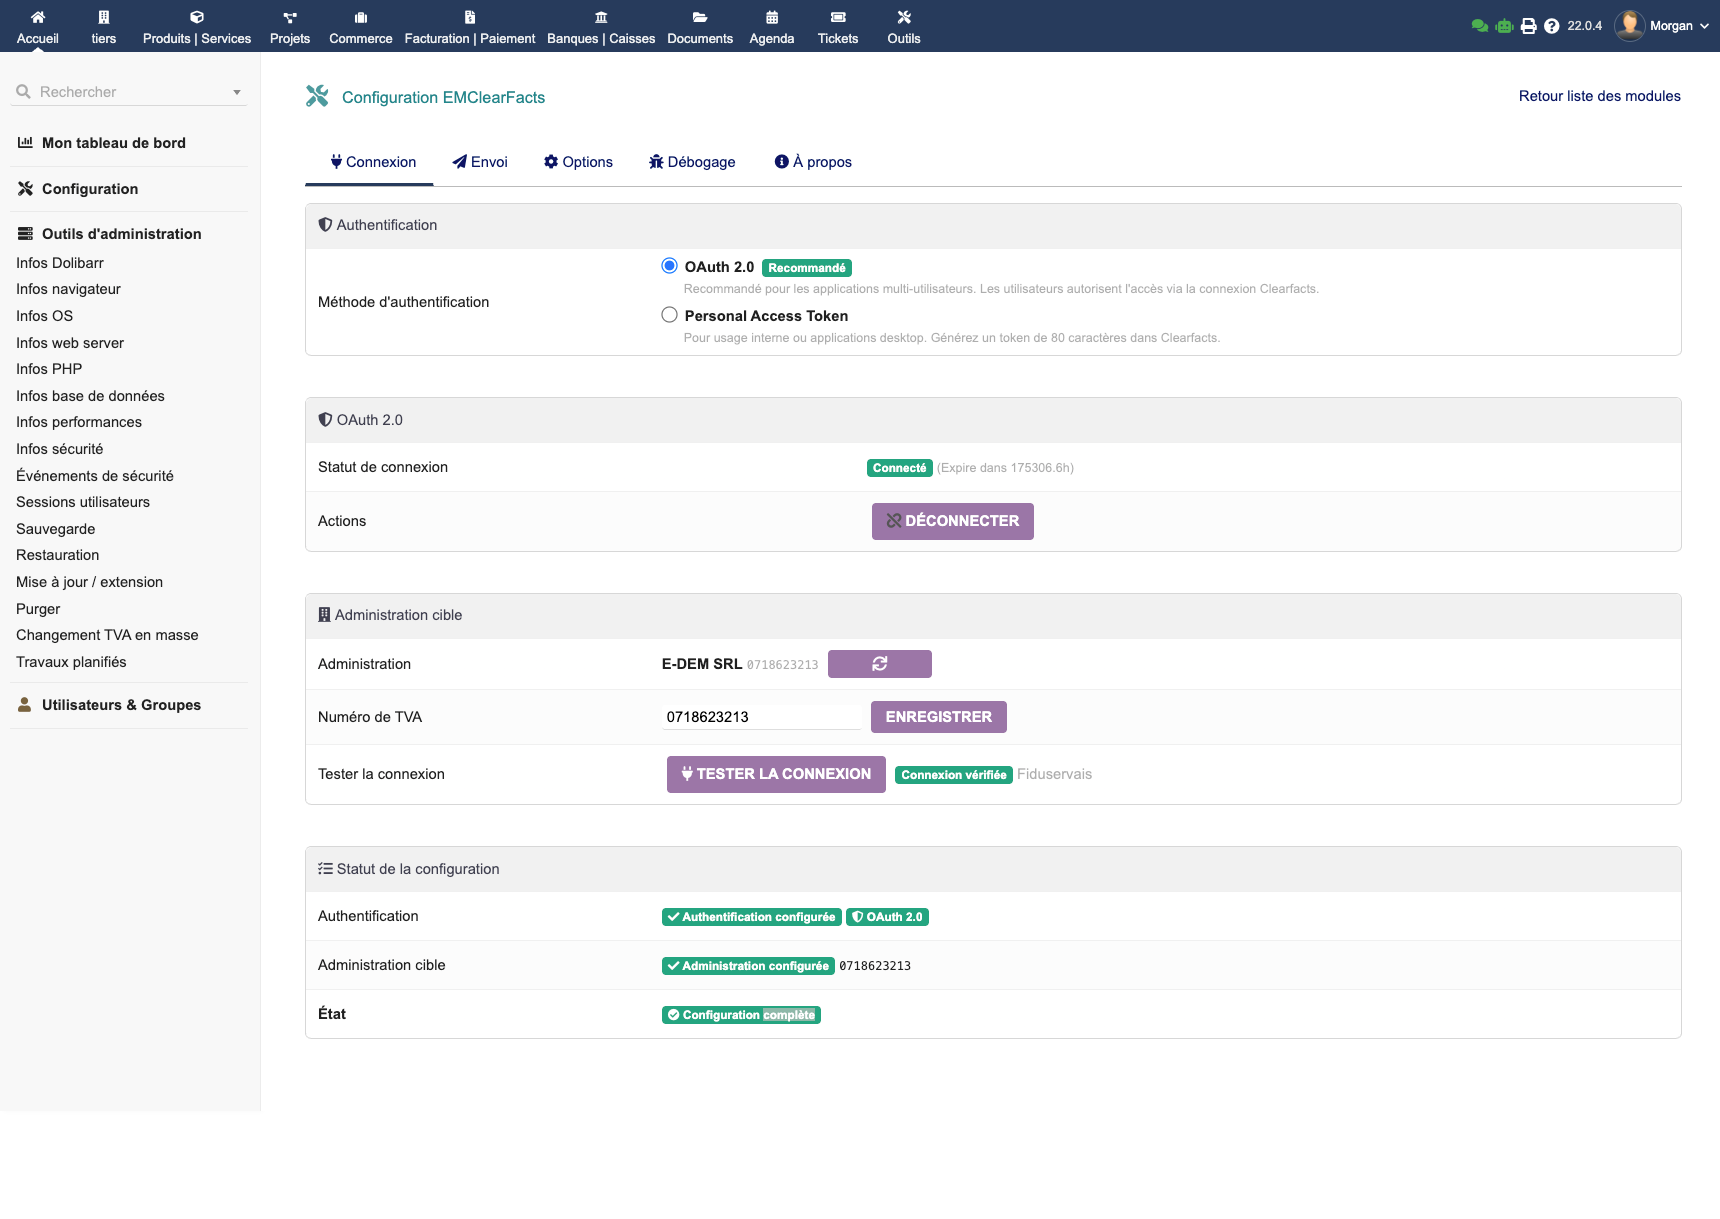
OAuth 2.0 Authentication (recommended)
OAuth 2.0 is the recommended method for multi-user environments. No token entry is required: the connection is handled through E-dem's OAuth relay.
- In the EMClearFacts configuration, select OAuth 2.0
- Click Connect to Clearfacts
- Authorise the connection in the Clearfacts window that opens
- The target administration is automatically retrieved from the API
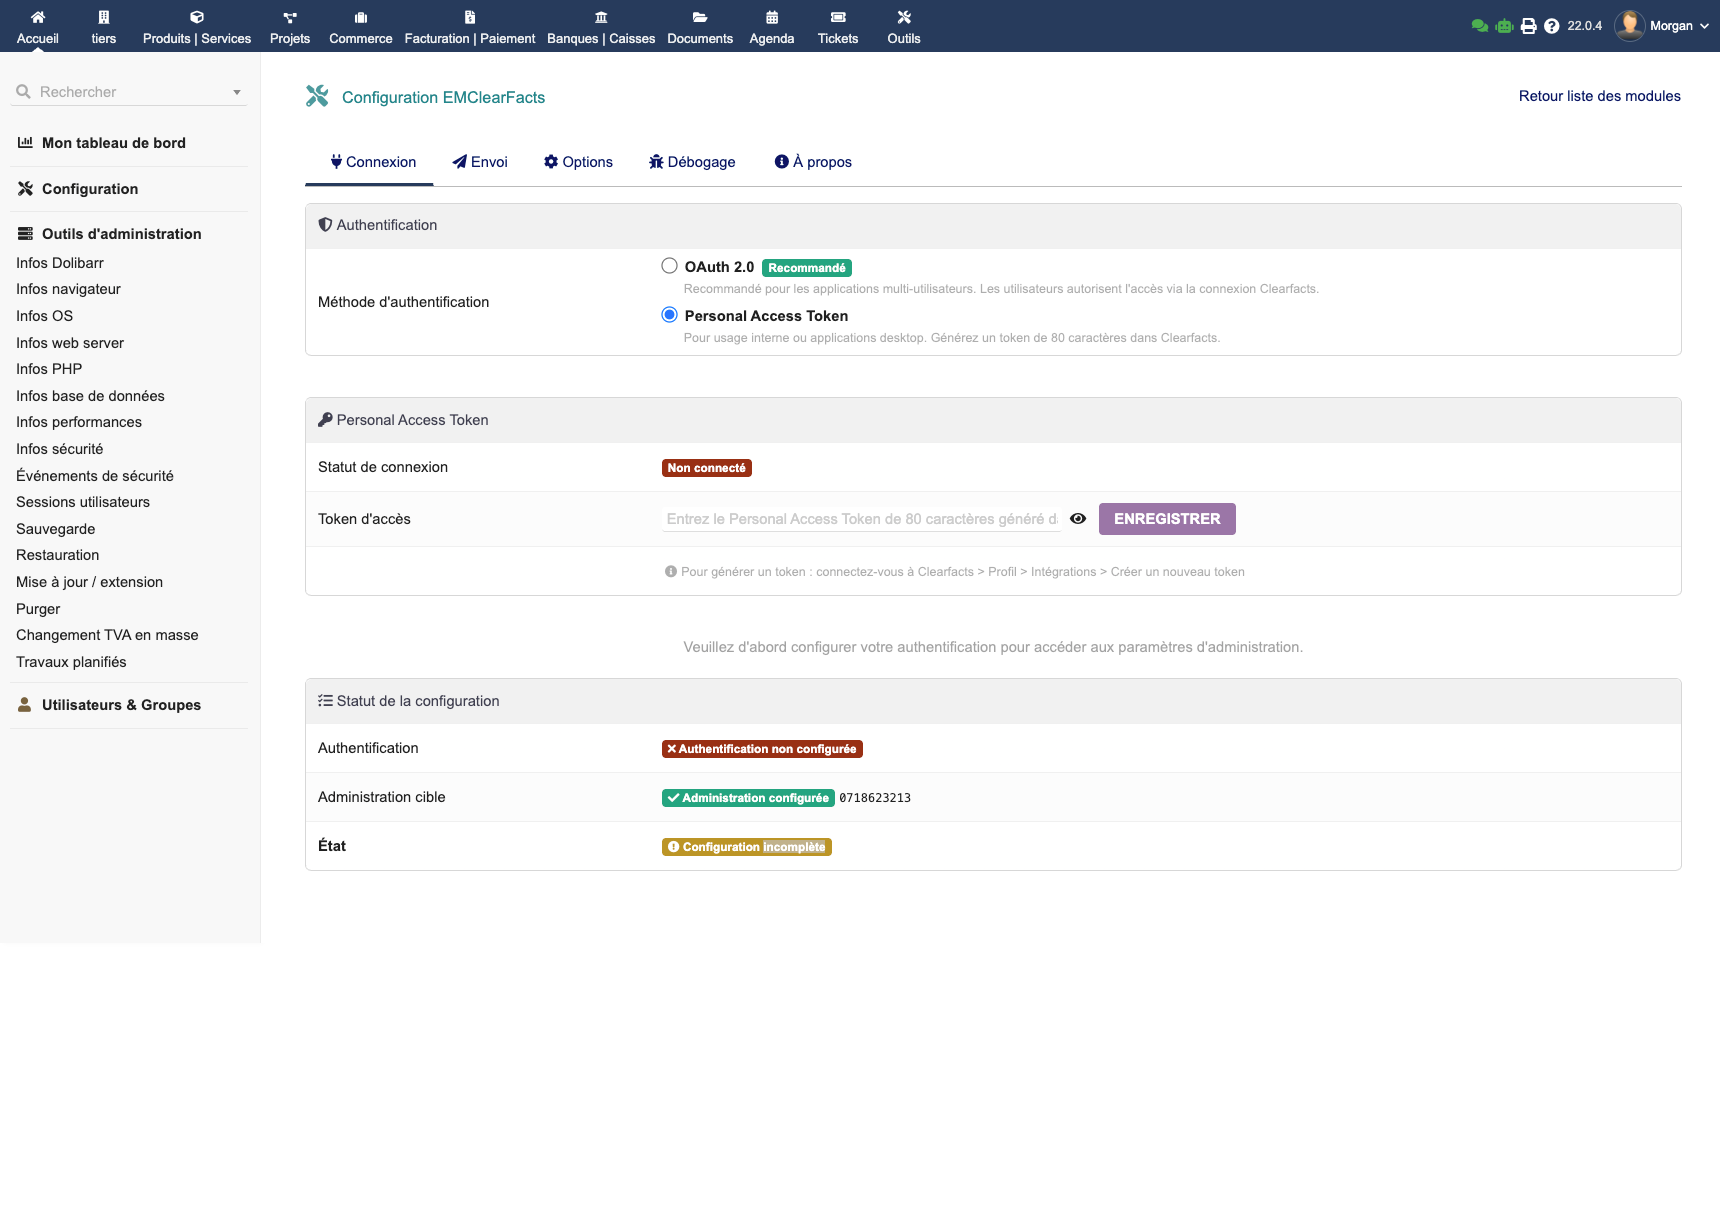
Personal Access Token Authentication
For quick single-user setup:
- Generate a Personal Access Token from your Clearfacts account
- Select Personal Access Token in the EMClearFacts configuration
- Paste your token (80 characters) into the dedicated field
- Click Save — the target administration is retrieved automatically
Sending Options
Configure customer and supplier invoices independently:
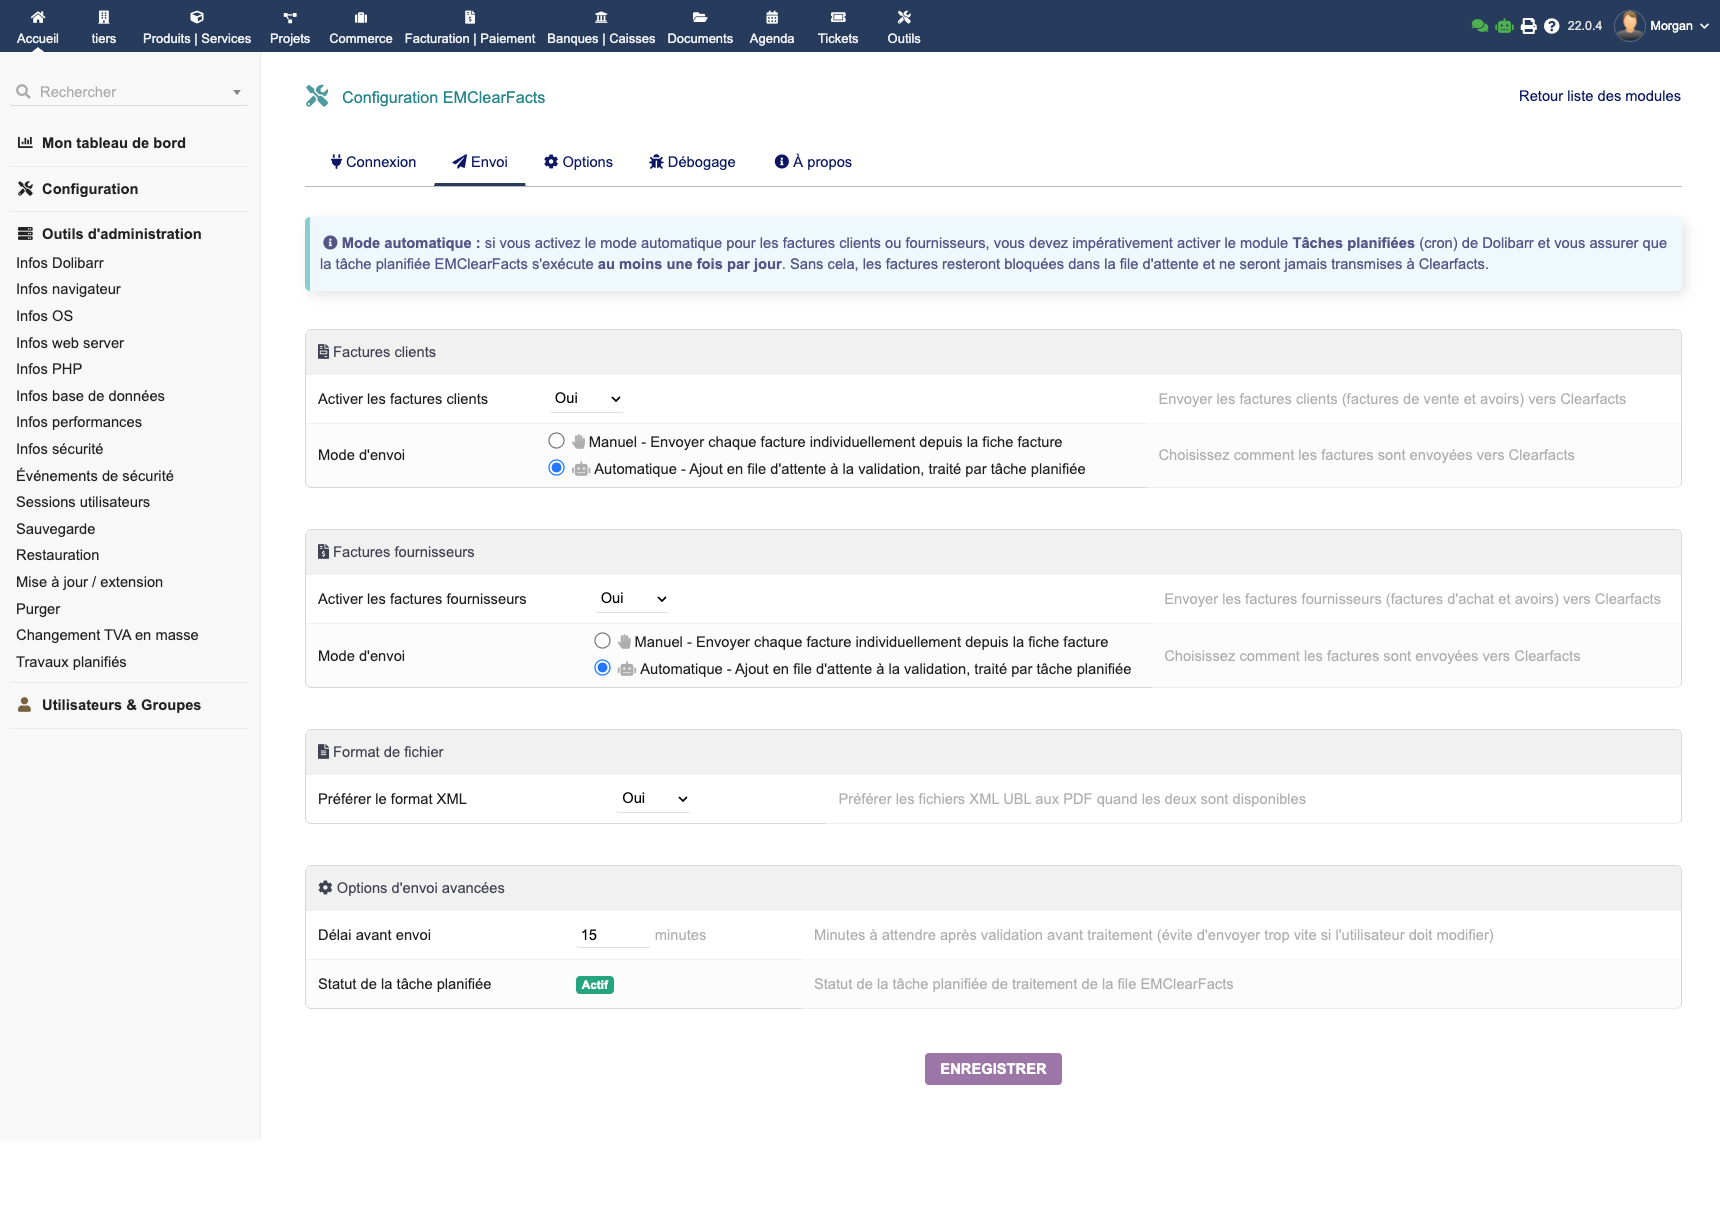
| Option | Description |
|---|---|
| Manual mode | A "Clearfacts" button on each invoice — you stay in control |
| Automatic mode | Upload triggered automatically when the invoice is validated |
| Preferred format | UBL XML (recommended, reused from EMPeppol if available) or PDF |
| Delay before sending | Safety delay after validation (default: 15 min) |
Important: Automatic mode requires the Dolibarr Scheduled Tasks module to be active.
Display Options
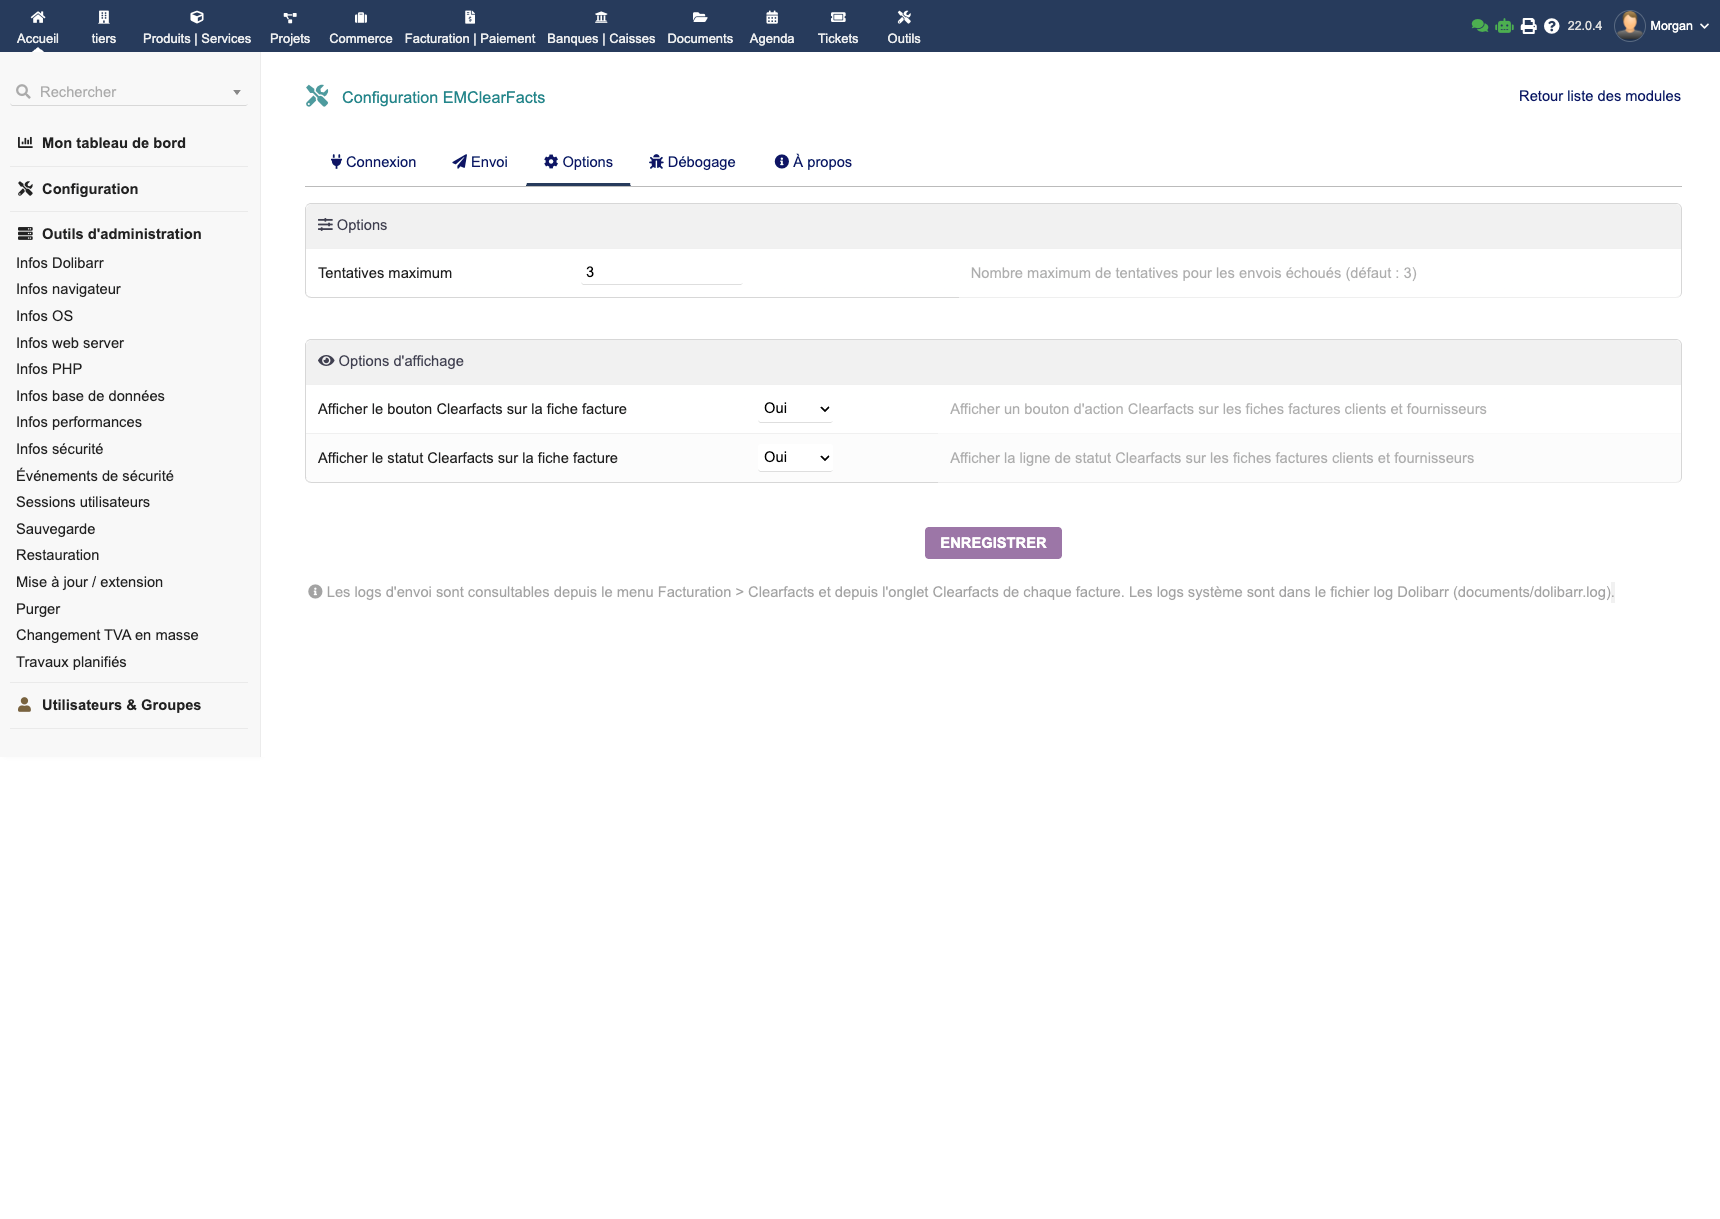
- Clearfacts button on invoice card: show or hide
- Status line on invoice card: show or hide
- Maximum retries: number of automatic retries on error (default: 3)
Sending Invoices
From an Invoice Card
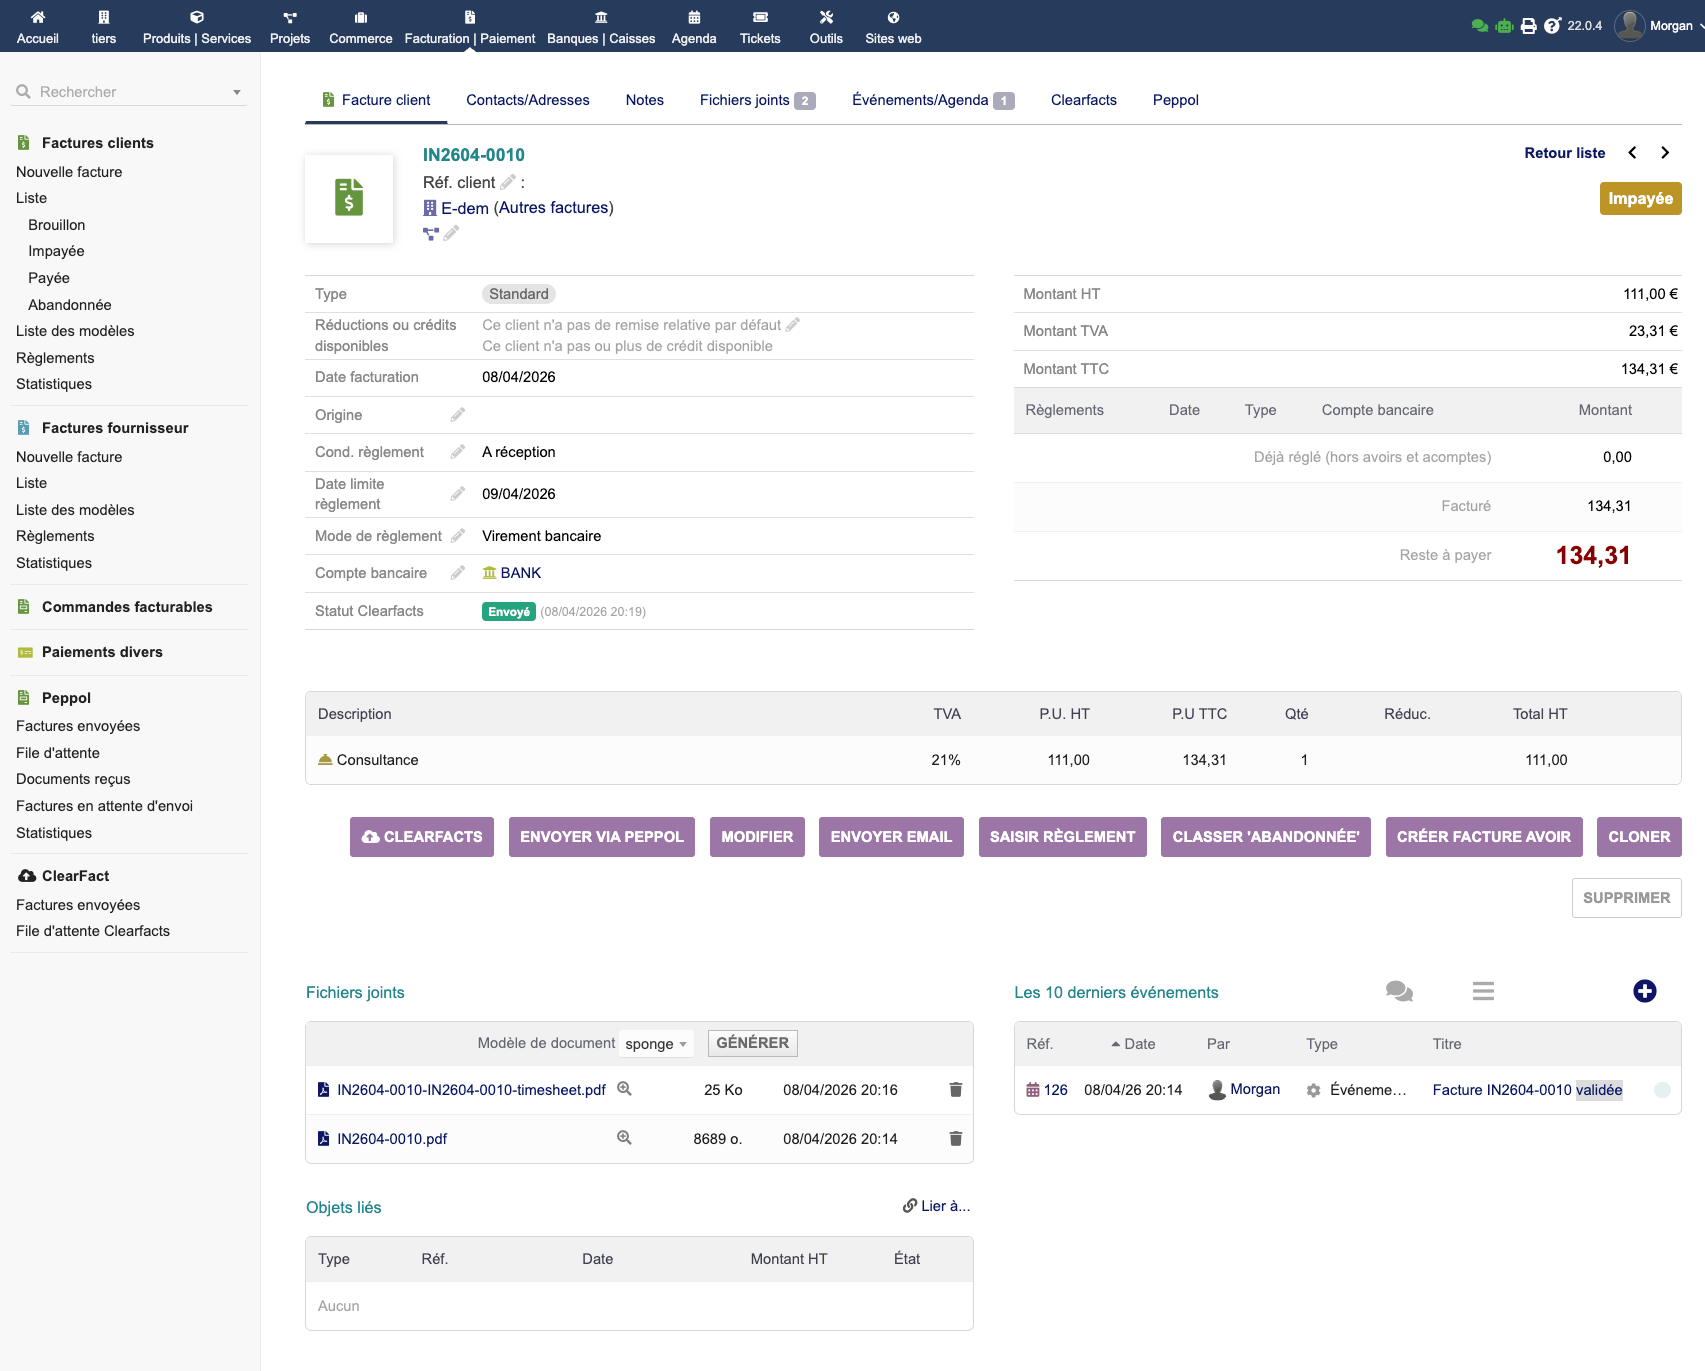
On any validated invoice, the CLEARFACTS button appears in the action bar. Click it to immediately upload the invoice to Clearfacts.
The upload status is visible directly in the invoice summary box (green "Sent" badge with date).
Clearfacts Tab
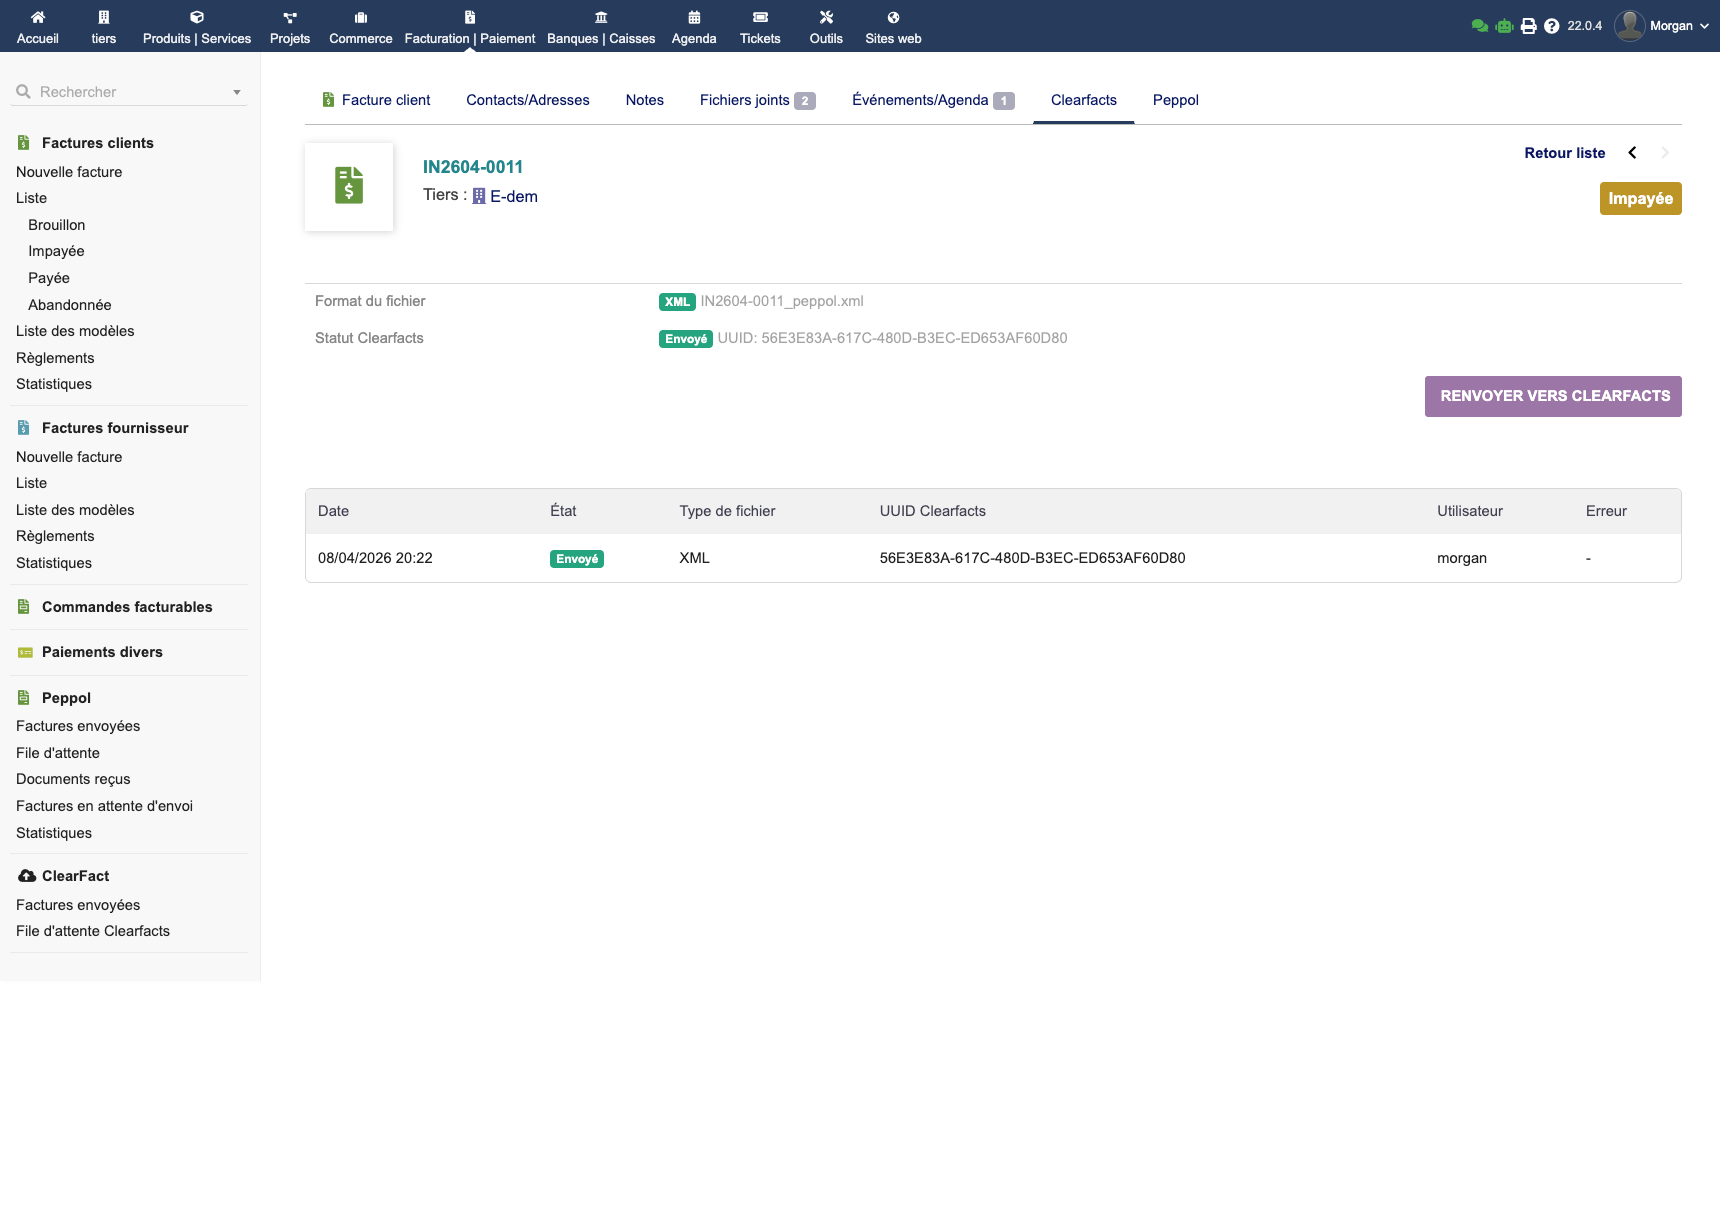
A dedicated tab on each invoice shows the complete upload history to Clearfacts: date, format, status, Clearfacts UUID and user. A RESEND TO CLEARFACTS button allows manual retry at any time.
Bulk Sending from the Invoice List
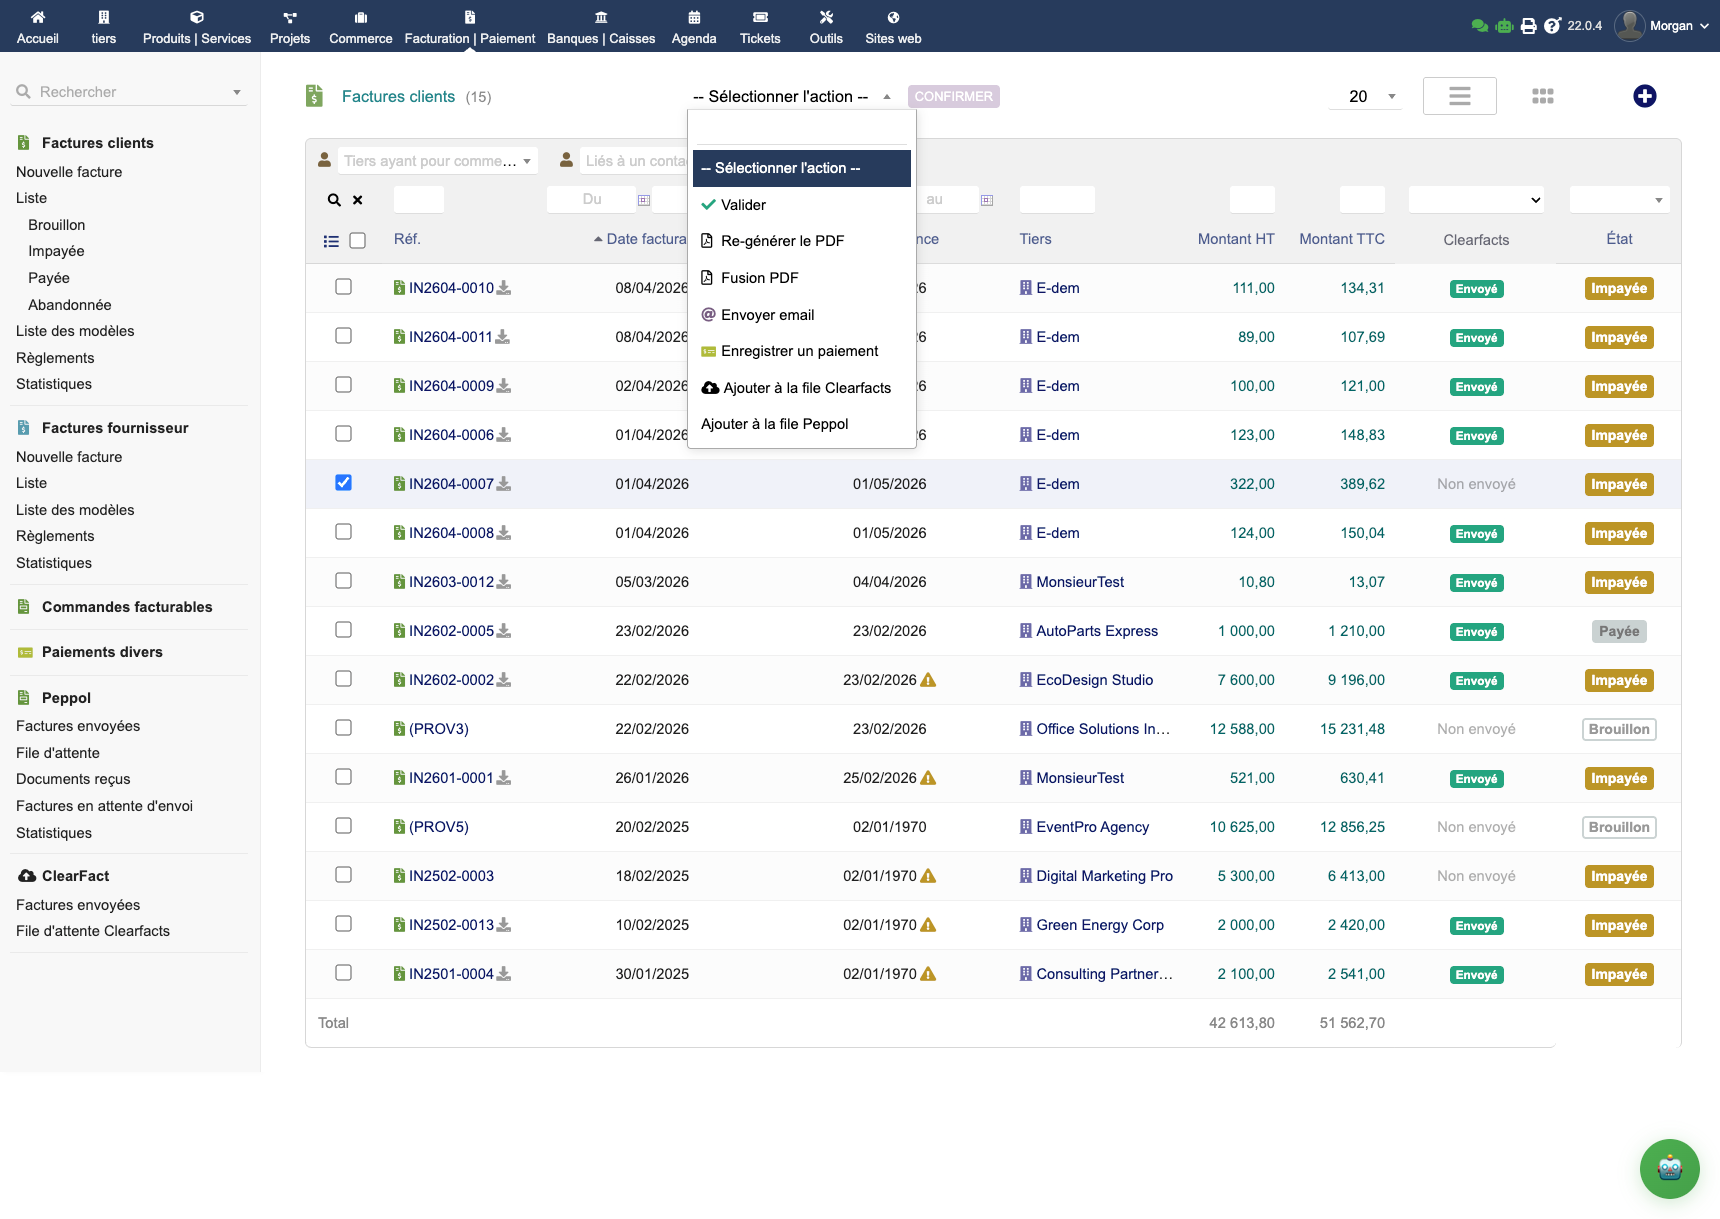
From the invoice list, select one or more invoices and use the mass action Add to Clearfacts queue. Invoices are added to the queue and processed in the background.
A Clearfacts column in the list shows the upload status of each invoice via coloured badges.
Queue and Monitoring
Upload Queue
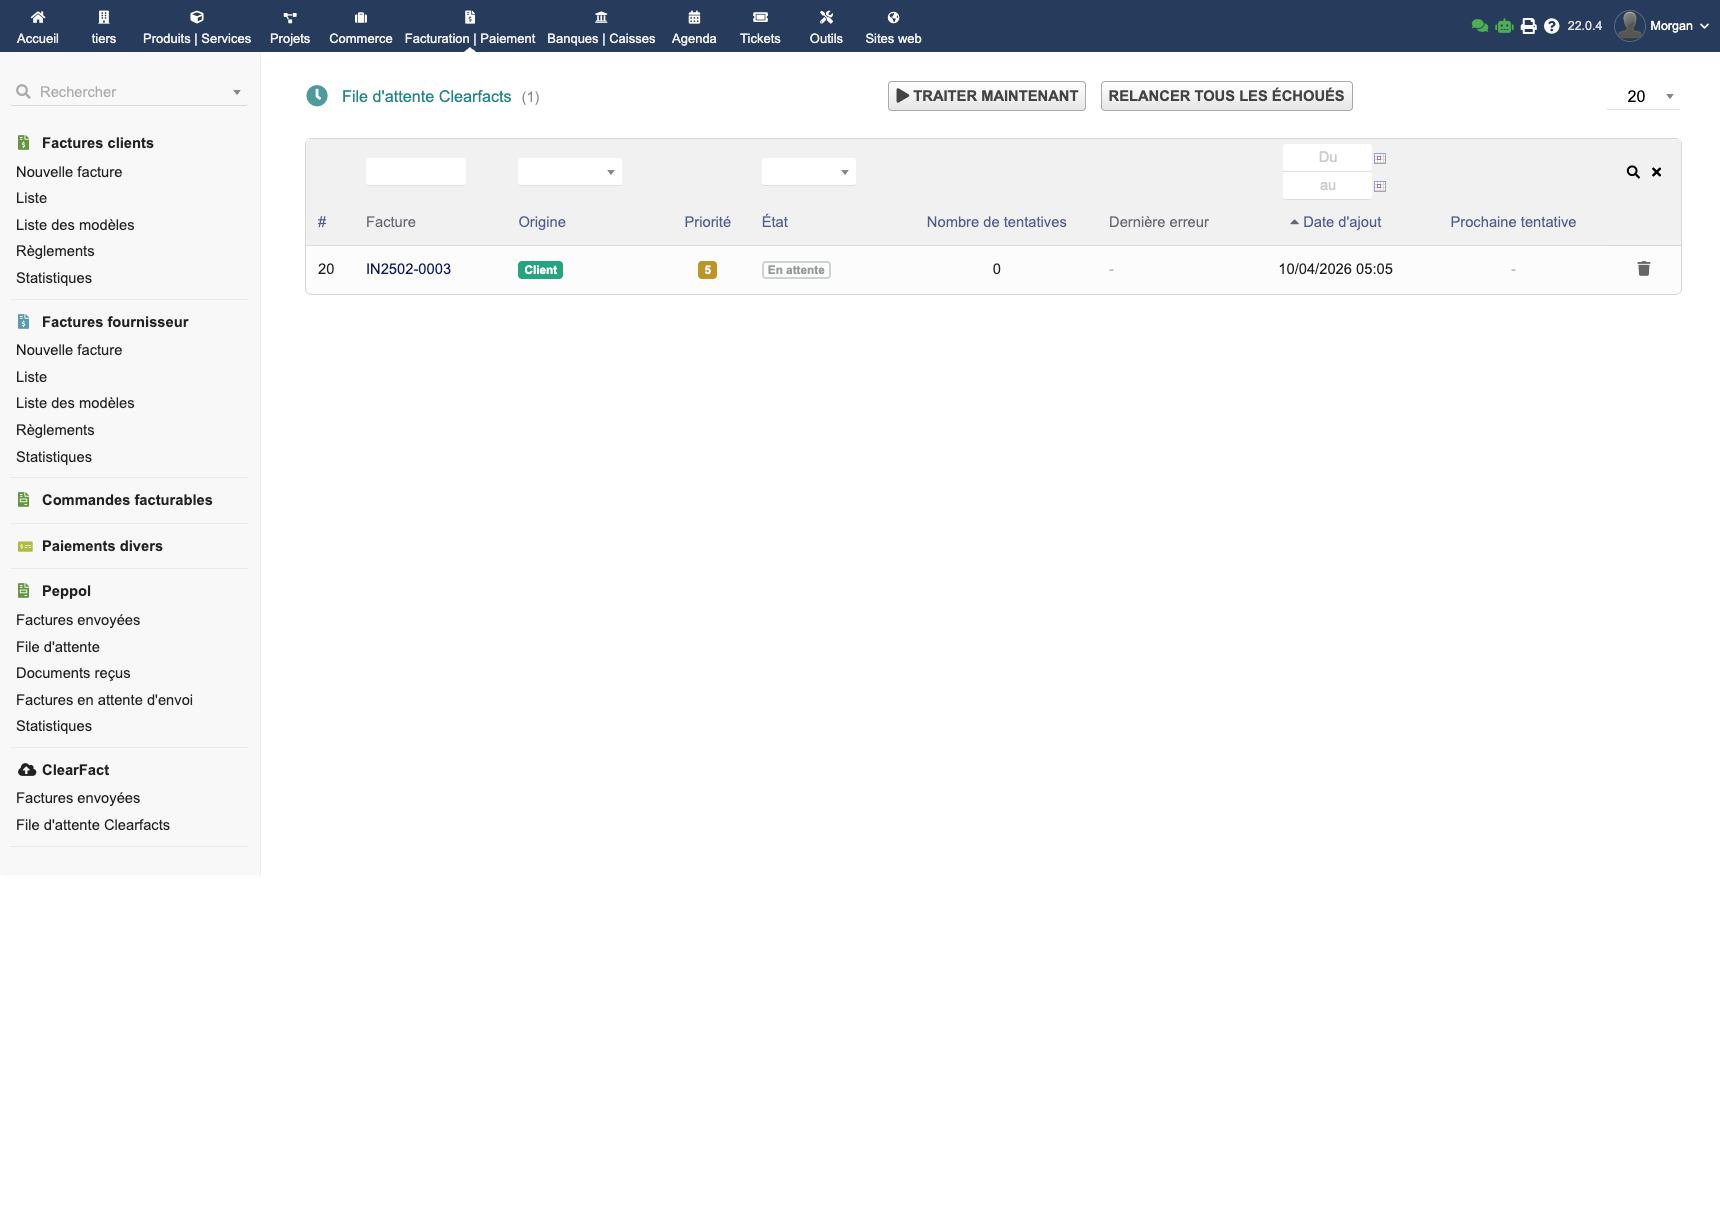
The queue centralises pending or in-progress uploads. It cleans itself automatically after each successful upload.
| Action | Description |
|---|---|
| PROCESS NOW | Forces an immediate upload without waiting for the backoff |
| RETRY ALL FAILED | Resets all failed items to "pending" for a new retry cycle |
Each queue item shows: reference, origin (customer/supplier), priority, status, retry counter, last error, next retry time.
Permanent History
The History page keeps all uploads as your official audit trail. This history is never automatically purged.
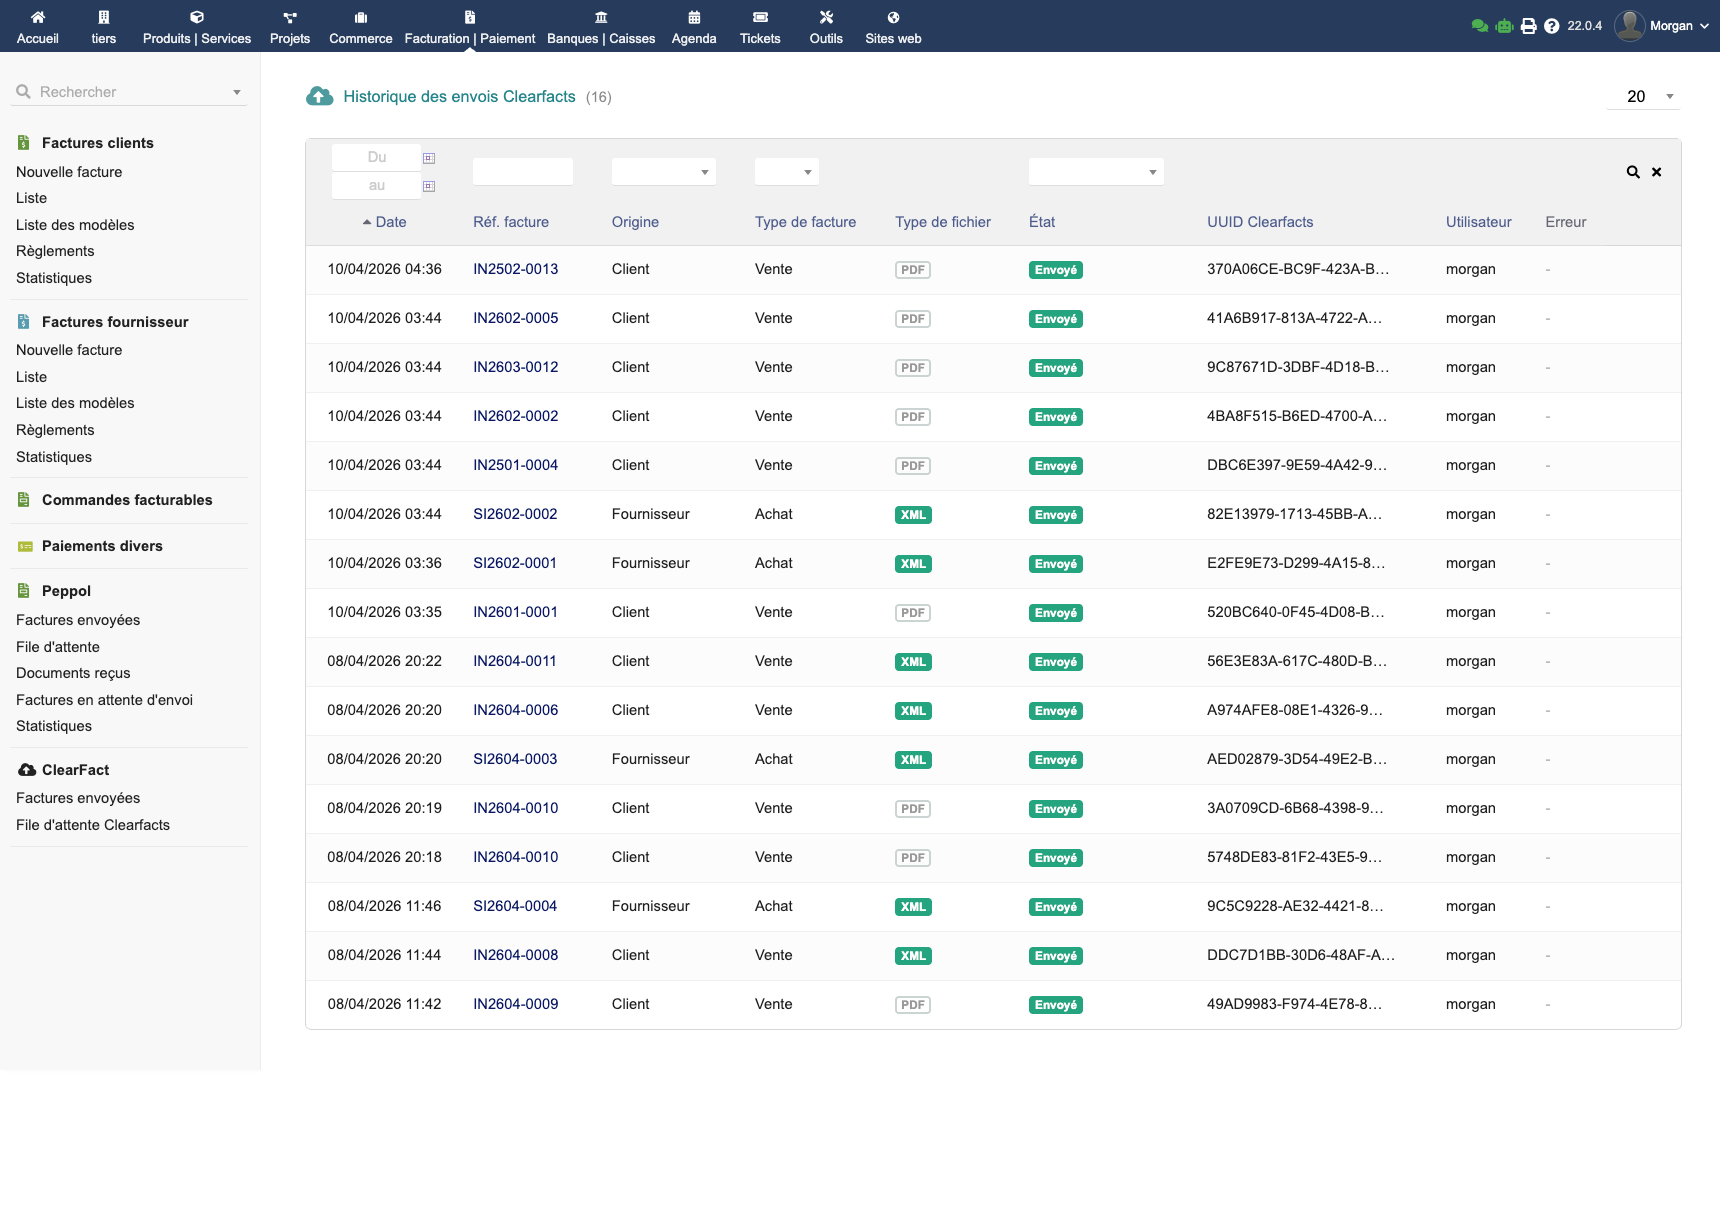
Each entry contains:
- Exact date and time
- Invoice reference (direct link)
- Origin (customer/supplier), type (sale/purchase)
- Format sent (PDF or UBL XML)
- Status with coloured badge
- Clearfacts UUID — direct link to the document in your Clearfacts account
- User who initiated the upload
Diagnostics and Maintenance
The debug page brings all tools together in a single screen:
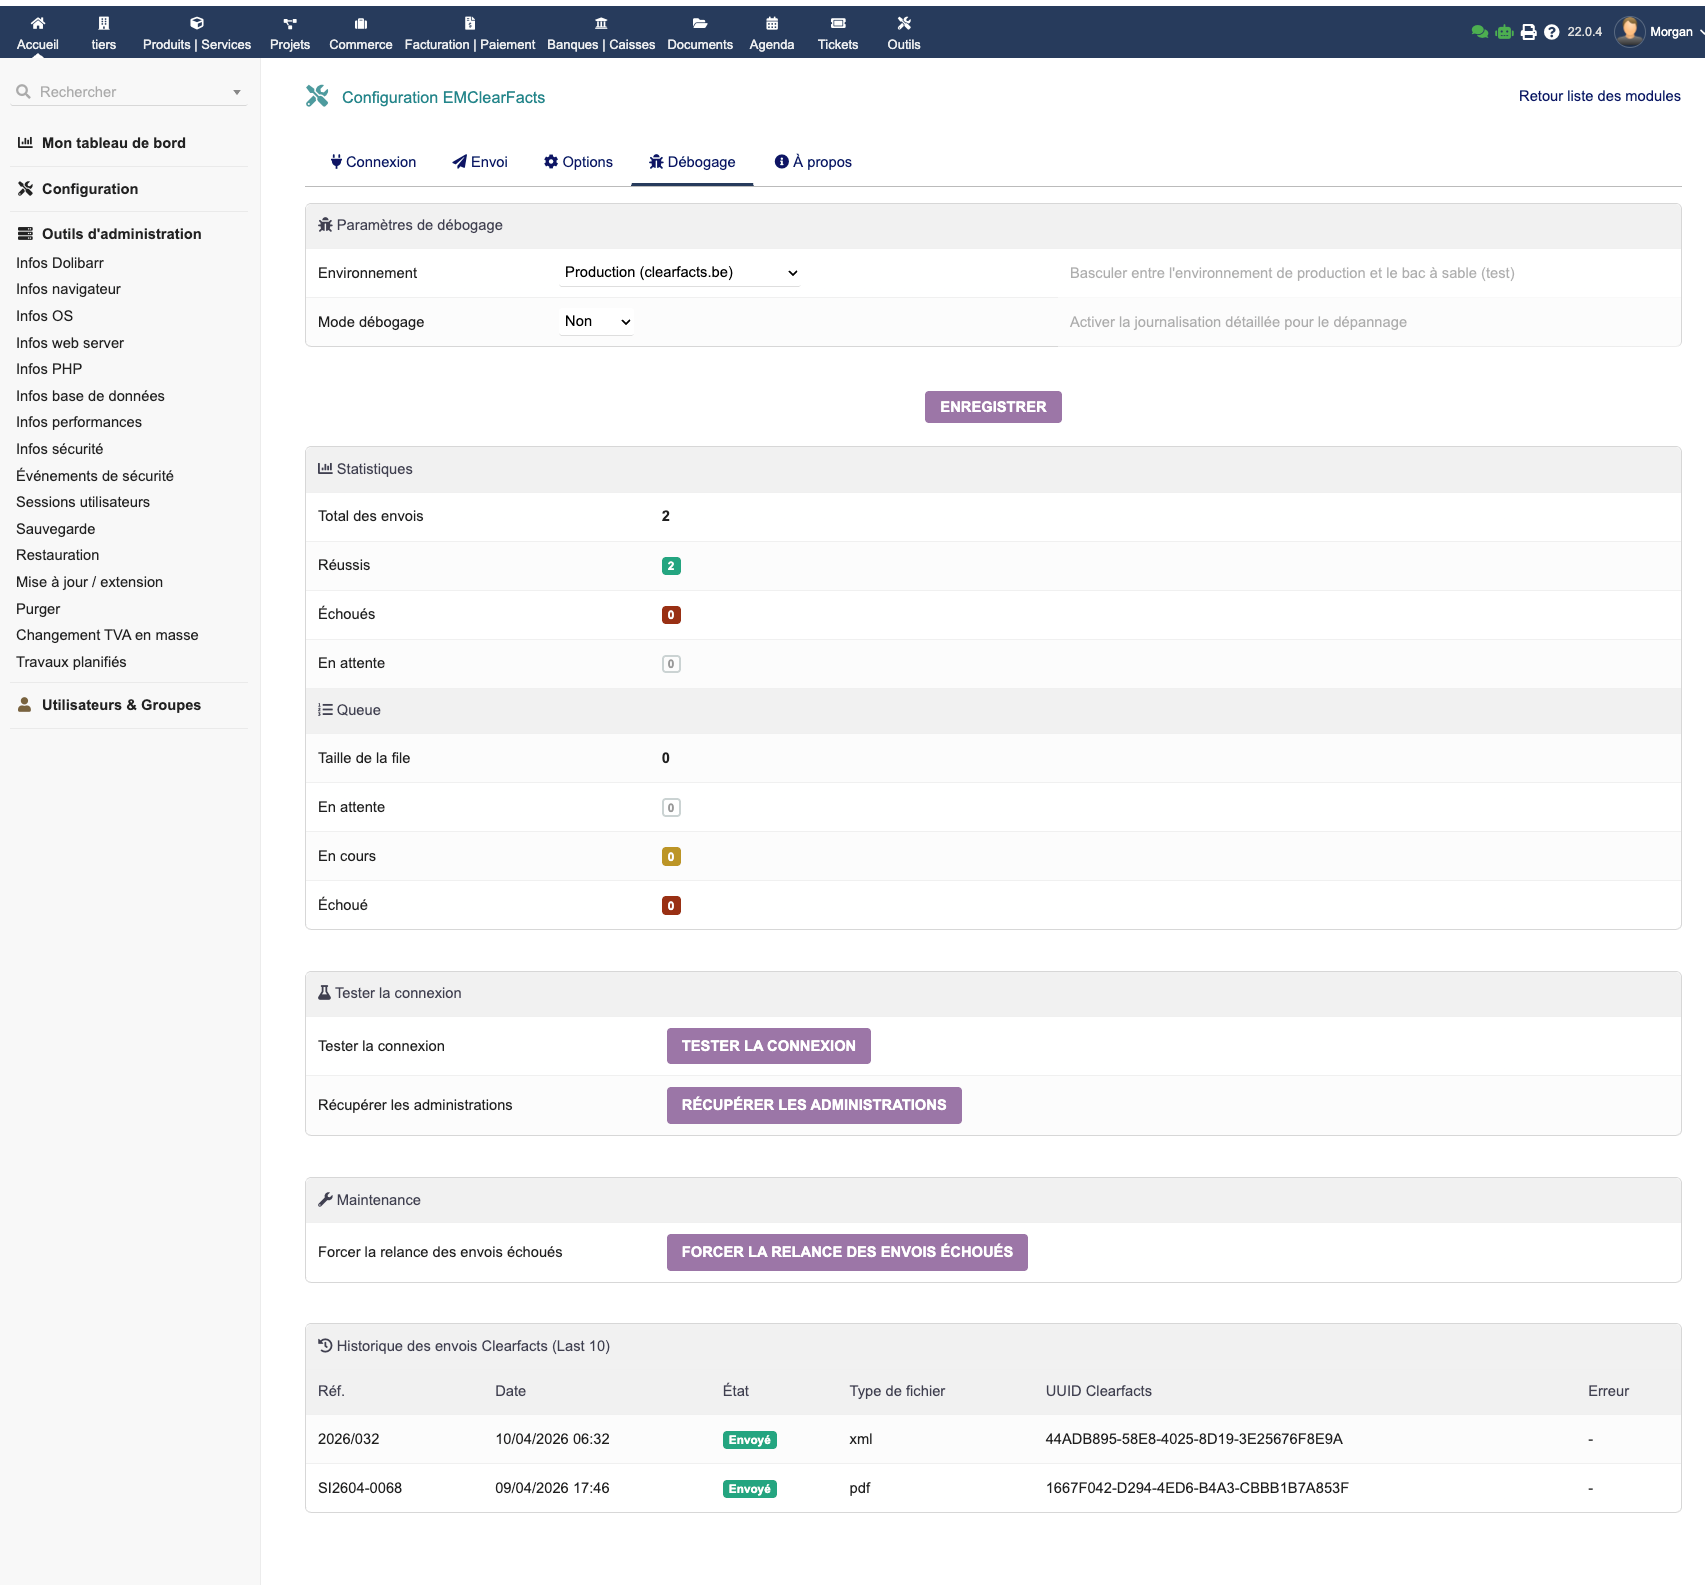
- Real-time statistics: total uploads, successful, failed, pending
- Queue: size, in progress, failed
- Test connection: API check in 1 click
- Fetch administrations: re-syncs accessible Clearfacts folders
- Force retry: retries all failed uploads
- Last 10 uploads history: instant diagnosis without leaving the page
- Environment selector: Sandbox or Production
Common Issues
Upload fails with authentication error → Check that your OAuth token or PAT is valid. Test the connection from the debug page.
Automatic mode does not send invoices → The Dolibarr Scheduled Tasks module must be active. Check its status in the sending configuration.
Invoice is sent to the wrong Clearfacts folder → Check the target administration in the configuration. Use "Fetch administrations" to re-sync.
XML format is not available → UBL XML is generated by EMPeppol. Without EMPeppol, only PDF is available (EMClearFacts switches automatically).
History does not show recent uploads → Successful uploads leave the queue but appear in the history. Check the History page, not the queue.
FAQ
Is a Clearfacts account required to use EMClearFacts?
Yes, you must have an active Clearfacts account with API access enabled. EMClearFacts is a connector for this platform.
Is EMClearFacts compatible with EMPeppol?
Yes, and they integrate well: EMClearFacts automatically reuses the UBL file generated by EMPeppol if available, avoiding double generation. Both buttons coexist on the invoice card.
Can supplier invoices be sent to Clearfacts?
Yes. Sending is independently configurable for customer and supplier invoices.
Is the history preserved when the module is updated?
Yes. The history is stored in the Dolibarr database and is never automatically purged by the module.
How do I update the module?
- Download the new version from the DoliStore
- Replace the files in
htdocs/custom/emclearfacts/ - Dolibarr detects the update and applies migrations automatically on next access
Where can I get help?
- E-dem support: Contact us for any technical question
- Clearfacts documentation: clearfacts.be for the platform itself